Data loss prevention (DLP) is an intelligent service that’s part of Microsoft Information Protection (MIP) in Microsoft 365. It looks for messages, files and other documents that contain sensitive information, and applies the policies you configure about what can and cannot be done with that data. The most common types of sensitive information an organization would want DLP to look for include credit card numbers, Social Security or insurance numbers, and other personally identifiable information (PII). DLP includes dozens of built-in sensitive information types, and you can also create your own custom types if you need to identify and protect specific content for security reasons or to meet compliance regulations.
The service uses DLP rules and policies to determine whether text is likely to be sensitive information. When users try to interact with that data, the service applies the policies you configured. For example, when a user attempts to attach a critical file to an email, it might either display a warning that says, in effect, “hey, this looks sensitive — are you sure you want to be sharing it?”, or block the action completely.
Setting Up Office 365 DLP Policies
In an Office 365 setting, it is best to configure tenant-wide DLP policies that take into account not just email but files and text in SharePoint and OneDrive for Business sites and other services as well. If you configure DLP in the Exchange admin center, it will work for email only, but if you set up the DLP policy in the right place, you get protection across multiple services for no additional cost. To set up tenant-wide DLP policies, take these simple steps:
- Go to the Security and Compliance Center in the administrative portal at https://protection.office.com/?rfr=AdminCenter#/homepage.
- On the left, click Data Loss Prevention, and then in the right pane, click Create a new policy.
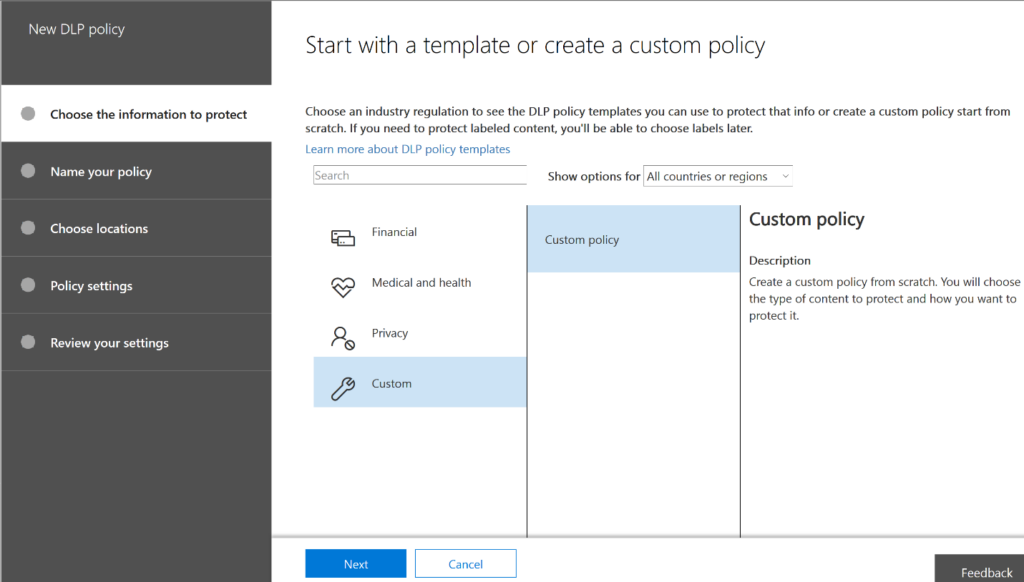
Figure 1. Starting a new DLP policy
Office 365 provides a number of pre-populated DLP policy templates. For example, for U.S. organizations, there are templates for detecting the following:
- Data subject to the Gramm-Leach-Bliley Act (GLBA)
- Data subject to the Payment Card Industry Data Security Standard (PCI-DSS)
- United States personally identifiable information (U.S. PII)
- Data subject to the Health Insurance Portability and Accountability Act of 1996 (HIPAA)
3. For our purposes, let’s click Financialand then Financial Data. Click Next.
4. Give the policy a name and description. Click Next.
5. On the “Choose locations” page, pick what parts of the Office 365 service this particular data loss prevention policy will be enforced in. For this walkthrough, let’s choose All locations. Then click Next.
6. On the next screen, you can customize the types of information this policy will apply to. In most cases, you will want to accept the defaults, at least initially. In this case, we’re looking for financial information such as credit card numbers, U.S. bank account numbers and routing numbers, and we want to know when anyone attempts to share this content with people outside our company. Click Next.

Figure 2. Specifying the type of content to protect with a DLP policy
7. Next, you’ll be asked what methods of enforcement you want to use. You can choose to simply show policy tips to the user, which will just inform the user that they’re working with sensitive information. Alternatively, you can select to notify certain people or block the actions. For our purposes, let’s change the number of instances required to 1 — even one credit card number leaked is too many these days — and choose to block people from sharing the content. (If your business model requires sharing of this type of sensitive data, you could use the DLP policy to automatically encrypt it before it is sent out; you’d just check the last box on this page.) Click Next.
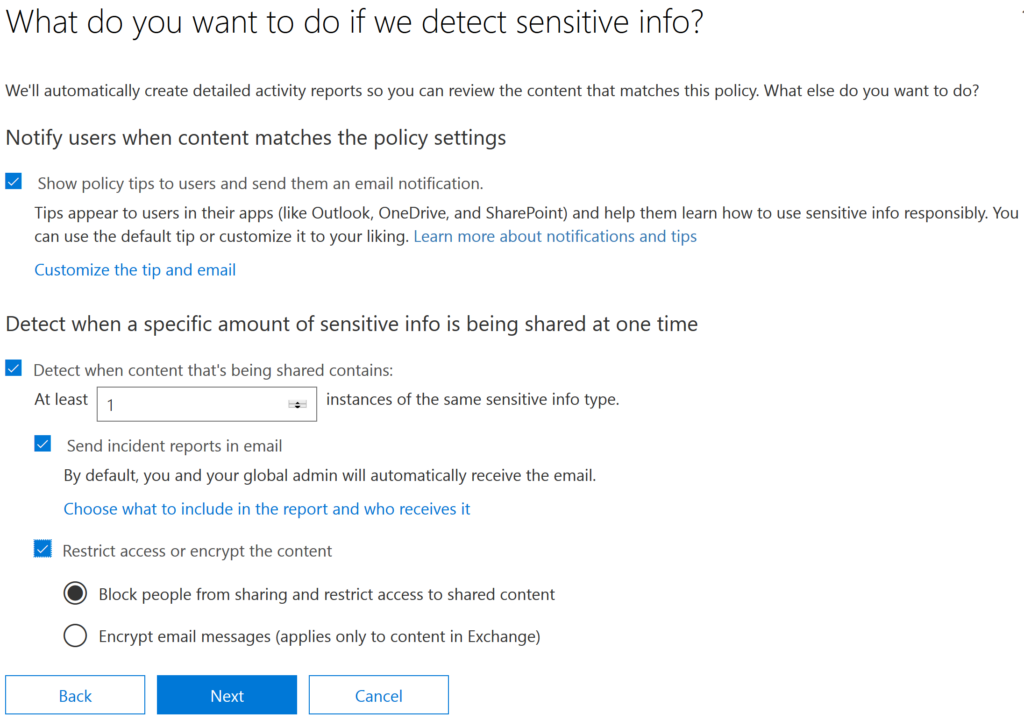
Figure 3. Configuring actions upon triggering a DLP policy
8. On the next page, you can choose to block certain people from accessing SharePoint and OneDrive for Business content and whether and how users can override the DLP policy.

Figure 4. Customizing access and override permissions
9. Finally, you can choose whether to run the policy in test mode or begin enforcement immediately. I recommend using test mode for a while to make sure you won’t adversely affect user workflows. Test mode flags policy matches but doesn’t actually prevent any content from being sent — it is like a “what if” mode that shows you what content would trigger a policy. You can also instruct Office to show tips in Outlook while in test mode for user edification.
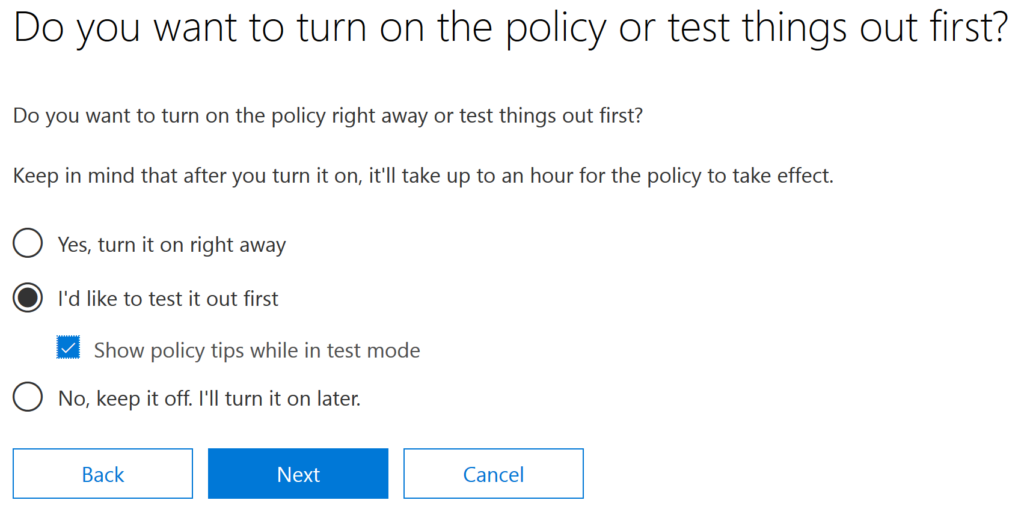
Figure 5. Activating the policy
10. Review your settings and close the wizard.
Viewing DLP Reports
To understand how DLP affects your organization, you should review how often your users tried to send content that matched a DLP policy. The Office 365 Security and Compliance Center offers reports that show how often policies were matched over a period of time and the number of false positives and overrides. You can filter on policy matches that hit in Exchange Online, OneDrive for Business and SharePoint Online, and you can also filter on severity, who the potential violator was and what action was taken.

Figure 6. Reporting on DLP policy matches
How Netwrix Solutions Can Help
The effectiveness of your DLP program strongly depends on accurate data classification and comprehensive data lifecycle management. Although Microsoft provides some data classification functionality, those capabilities have multiple limitations; in particular, they lack flexibility in tuning, are not transparent about classification reasons, and have a limited set of supported file formats. Therefore, using them can result in a lot of false positives and false negatives, which can lead to sensitive data being left unprotected and trivial data being overly restricted. As a result, security and compliance can suffer and business processes can be disrupted and delayed. For these reasons, many companies choose to use Office 365 classification as a foundation and add third-party solutions to provide higher level of accuracy.
Netwrix Data Classification delivers highly accurate classification that is integrated with Microsoft Information Protection. The Netwrix solution performs statistical analysis, analyzes and classifies content, and applies the corresponding MIP labels. Whatever security policies are assigned to the label are automatically applied to the content. The labels can be used as a condition in Microsoft DLP policies for:
- Exchange Online email messages
- SharePoint Online
- OneDrive for Business sites
- Windows 10 devices
By dramatically reducing the false negatives and false positives associated with native classification, Netwrix Data Classification slashes the risk of a sensitive file being shared externally or accessed by malicious actors. It also helps minimize business interruptions, since non-sensitive files are not blocked unnecessarily.
Conclusion
As your organization moves content to the cloud, it’s critical to accurately classify and protect all sensitive information you store there. Office 365 DLP can be a valuable first step. As your information governance program matures, consider enhancing the effectiveness of DLP with a third-party solution that delivers more accurate and automated classification capabilities.
This article was written by Jonathan Hassell and originally appeared in the Netwrix blog.